Mastering the Dual Blades in Monster Hunter Wilds: A Comprehensive Guide
In Monster Hunter Wilds, speed and precision can overcome brute force. The Dual Blades, with their rapid attacks, are perfect for this strategy. This guide details effective Dual Blades techniques.
Recommended Videos Dual Blades in Monster Hunter Wilds
The Dual Blades are versatile weapons, excelling in rapid, successive strikes. Mastering both modes unlocks their full potential.
All Moves
| Command | Move | Description |
|---|---|---|
| Triangle/Y | Double Slash/Circle Slash | A fundamental combo starter. Initiate with a Double Slash (Triangle/Y), followed by a Circle Slash (another Triangle/Y). |
| Circle/B | Lunging Strike/Roundslash | A forward slashing attack (direction controlled by the analog stick). A second press executes a Roundslash. |
| R2/RT | Demon Mode | Activates Demon Mode, enhancing attack power, movement speed, evasion, and granting knockback immunity. |
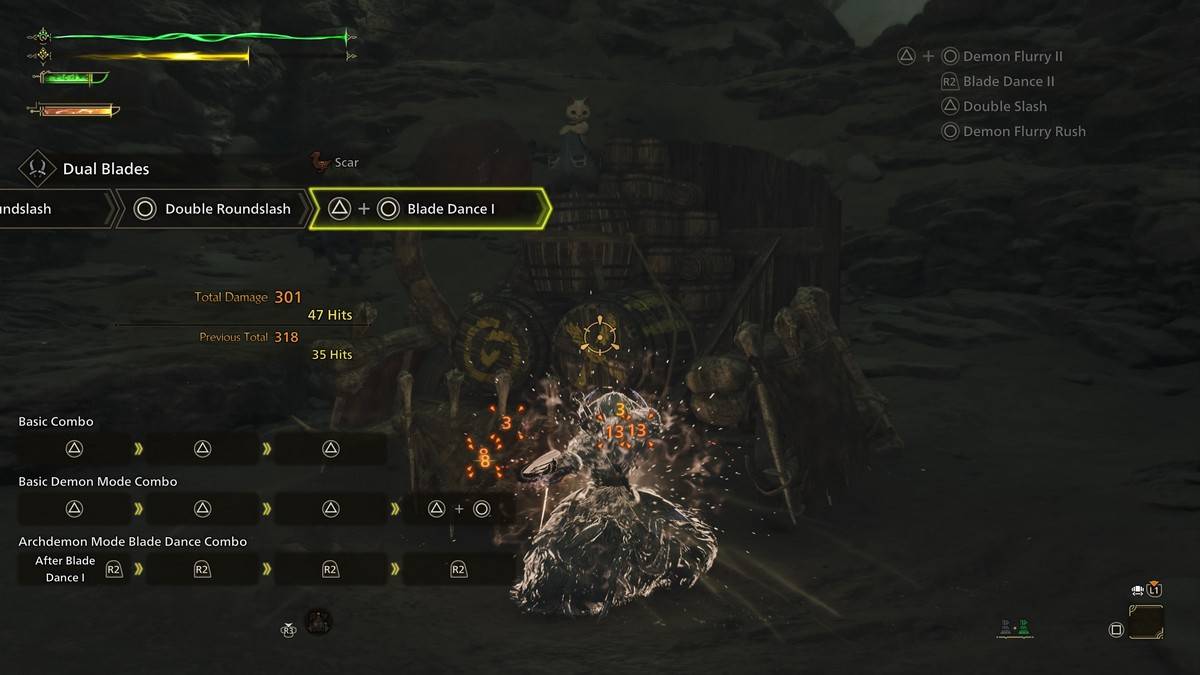
| Triangle/Y + Circle/B (Demon Mode) | Blade Dance I, II, III | Powerful chained attacks in Demon Mode, consuming the Demon Gauge. |
| Triangle/Y + Circle/B (Archdemon Mode) | Demon Flurry I, II | Powerful attacks exclusive to Archdemon Mode, consuming the Demon Gauge. Analog stick controls direction. Chainable with Blade Dance using R2/RT. |
| Cross/A (Demon/Archdemon Mode) | Demon Dodge | A faster dodge in Demon/Archdemon Mode. Perfect Evades allow attacks during the dodge, providing a temporary buff. Does not consume the Demon Gauge in Demon Mode. |
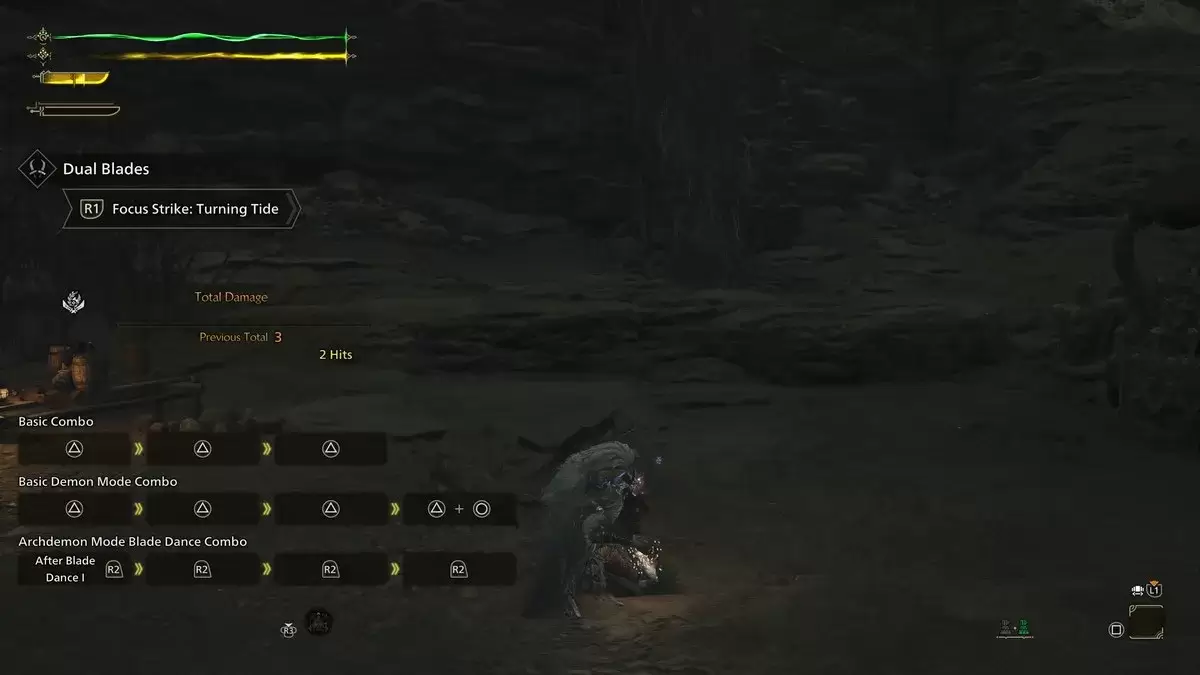
| L2/LT + R1/RB | Focus Strike: Turning Tide | A slashing attack particularly effective against wounded monsters. Hitting a wound triggers a Midair Spinning Blade Dance, capable of damaging multiple wounds. |
Demon Mode/Demon Gauge and Archdemon Mode
The Dual Blades feature a unique Demon Gauge. Demon Mode, activated via R2/RT, boosts stats and grants knockback immunity but consumes stamina. Successful attacks in Demon Mode fill the Demon Gauge. A full gauge triggers Archdemon Mode, which gradually depletes the gauge but enables powerful, gauge-consuming attacks. The Demon Gauge stops depleting while mounted.
Demon Dodge
A Perfect Evade triggers Demon Dodge, increasing damage and allowing attacks during dodges. It provides a 12-second damage buff, with subsequent dodges inflicting additional spinning damage.
Combos
Dual Blades combos revolve around Demon and Archdemon Modes.
Basic Combo
A three-part Triangle/Y combo (Double Slash, Double Slash Return Stroke, Circle Slash) provides consistent damage. Alternatively, a Circle/B combo (Demon Flurry Rush – Spinning Slash – Double Roundslash) rapidly fills the Demon Gauge.
Demon Mode Basic Combo
In Demon Mode, the basic combo becomes more potent: Demon Fangs, Twofold Demon Slash, Sixfold Demon Slash, culminating in a Triangle/Y + Circle/B for Demon Flurry I.
Archdemon Mode Blade Dance Combo
In Archdemon Mode, chain Blade Dance (Triangle/Y + Circle/B) with four R2/RT presses for Demon Flurry I, Blade Dance II, Demon Flurry II, and Blade Dance III, delivering massive damage.
Related: How to Capture Monsters in Monster Hunter Wild
Dual Blade Tips
Masterful Dual Blades usage involves seamless transitions between modes.
Always Follow Up
The Circle/B (x3) combo smoothly transitions into Demon/Archdemon Mode combos (Triangle/Y + Circle/B x3), maximizing damage output.
Maintain Stamina
Demon Mode's stamina drain necessitates careful management. Utilize Focus Strike on wounded monsters to fill the Demon Gauge without depleting stamina.
Dodge Strategically
Dodge frequently, as the Dual Blades lack strong defensive options. The fast attack animations allow for calculated dodges and openings.
Sharpening is Crucial
Frequent attacks necessitate frequent sharpening. The Speed Sharpening skill significantly reduces downtime.
This guide provides a comprehensive overview of Dual Blades mastery in Monster Hunter Wilds. Consult The Escapist for further game assistance.
Monster Hunter Wilds is available on PlayStation, Xbox, and PC.